GMK TriggerKey Review: Adjustable Actuation on an MX Keyboard
GMK’s four-key kit uses a hinged keycap to shorten the press needed to register an input. On a Cherry MX Nixie, I could tune it to register with a light touch.
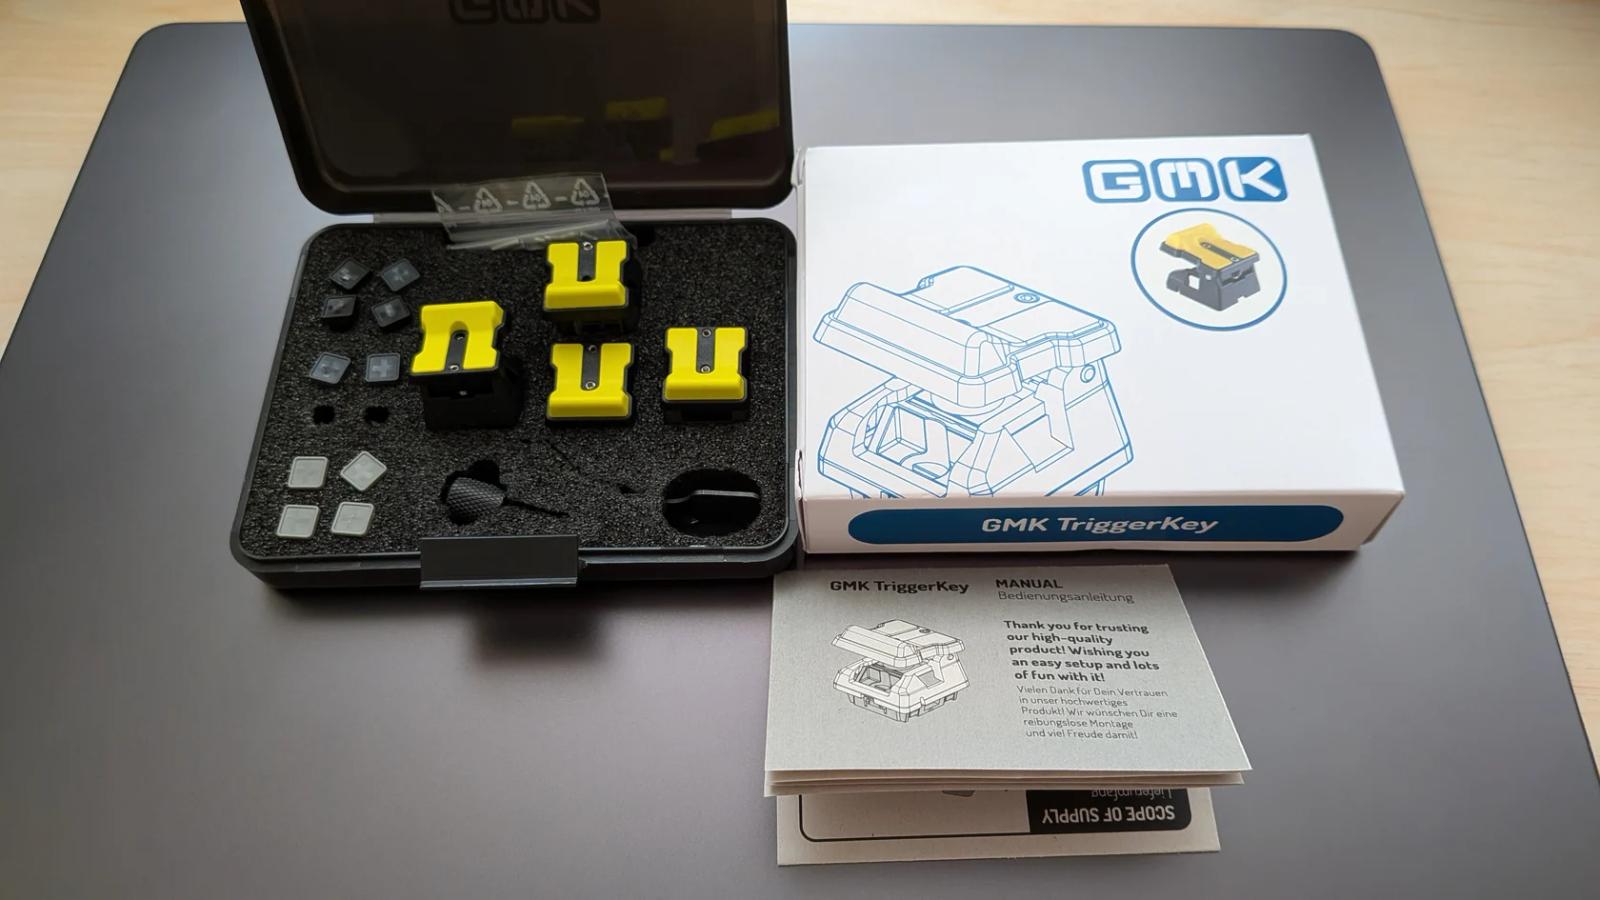
What’s GMK TriggerKey?
GMK TriggerKey is a set of four hinged keycaps for gaming keys such as WASD. On a compatible mechanical MX switch, the lever and adjustment screw let you shorten how far you press before the key registers.
Many Hall effect (HE) keyboards let you set the actuation point in software. If your HE switch fits the TriggerKey, the raised edge and adjustable angle can make the key easier to press.
A keycap that moves like a pedal
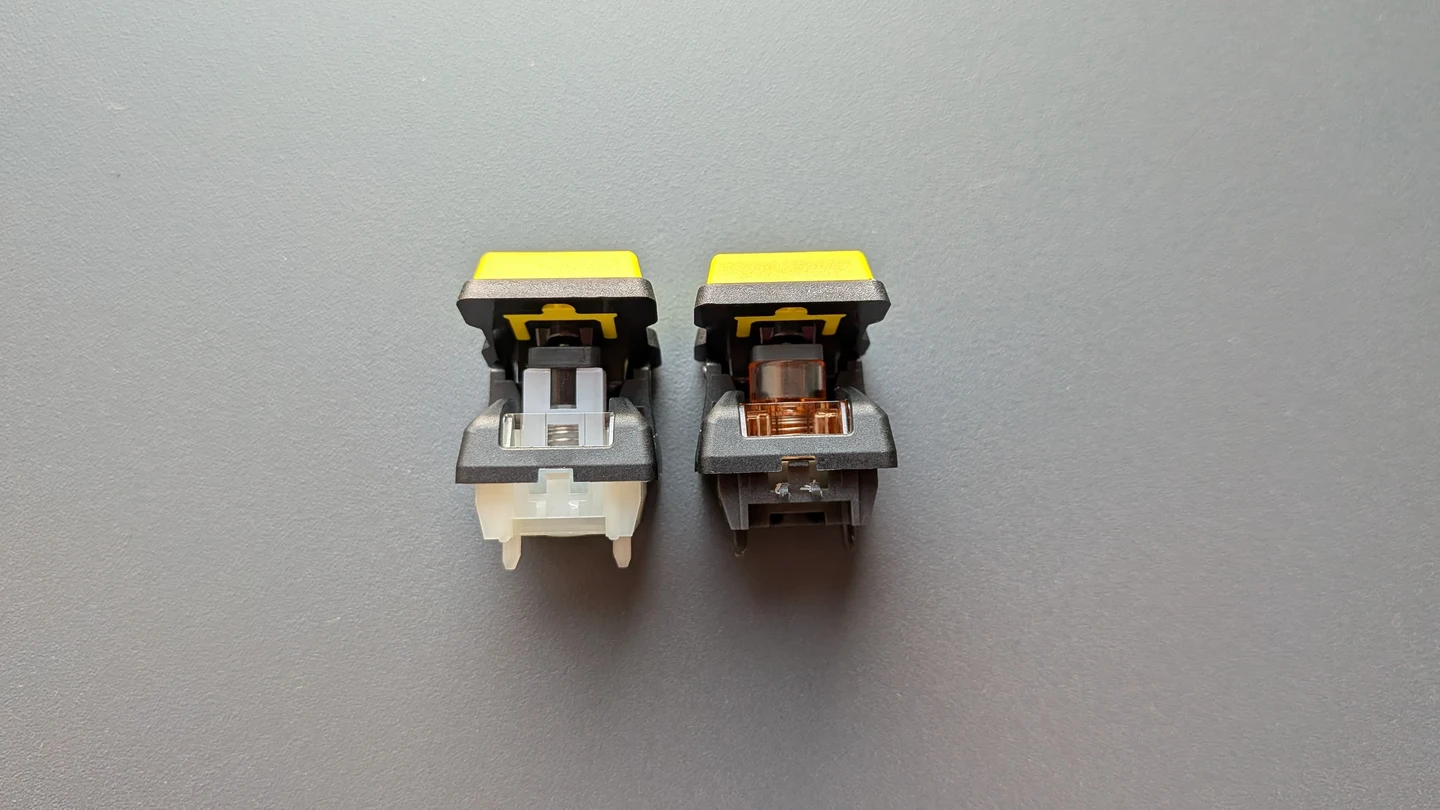
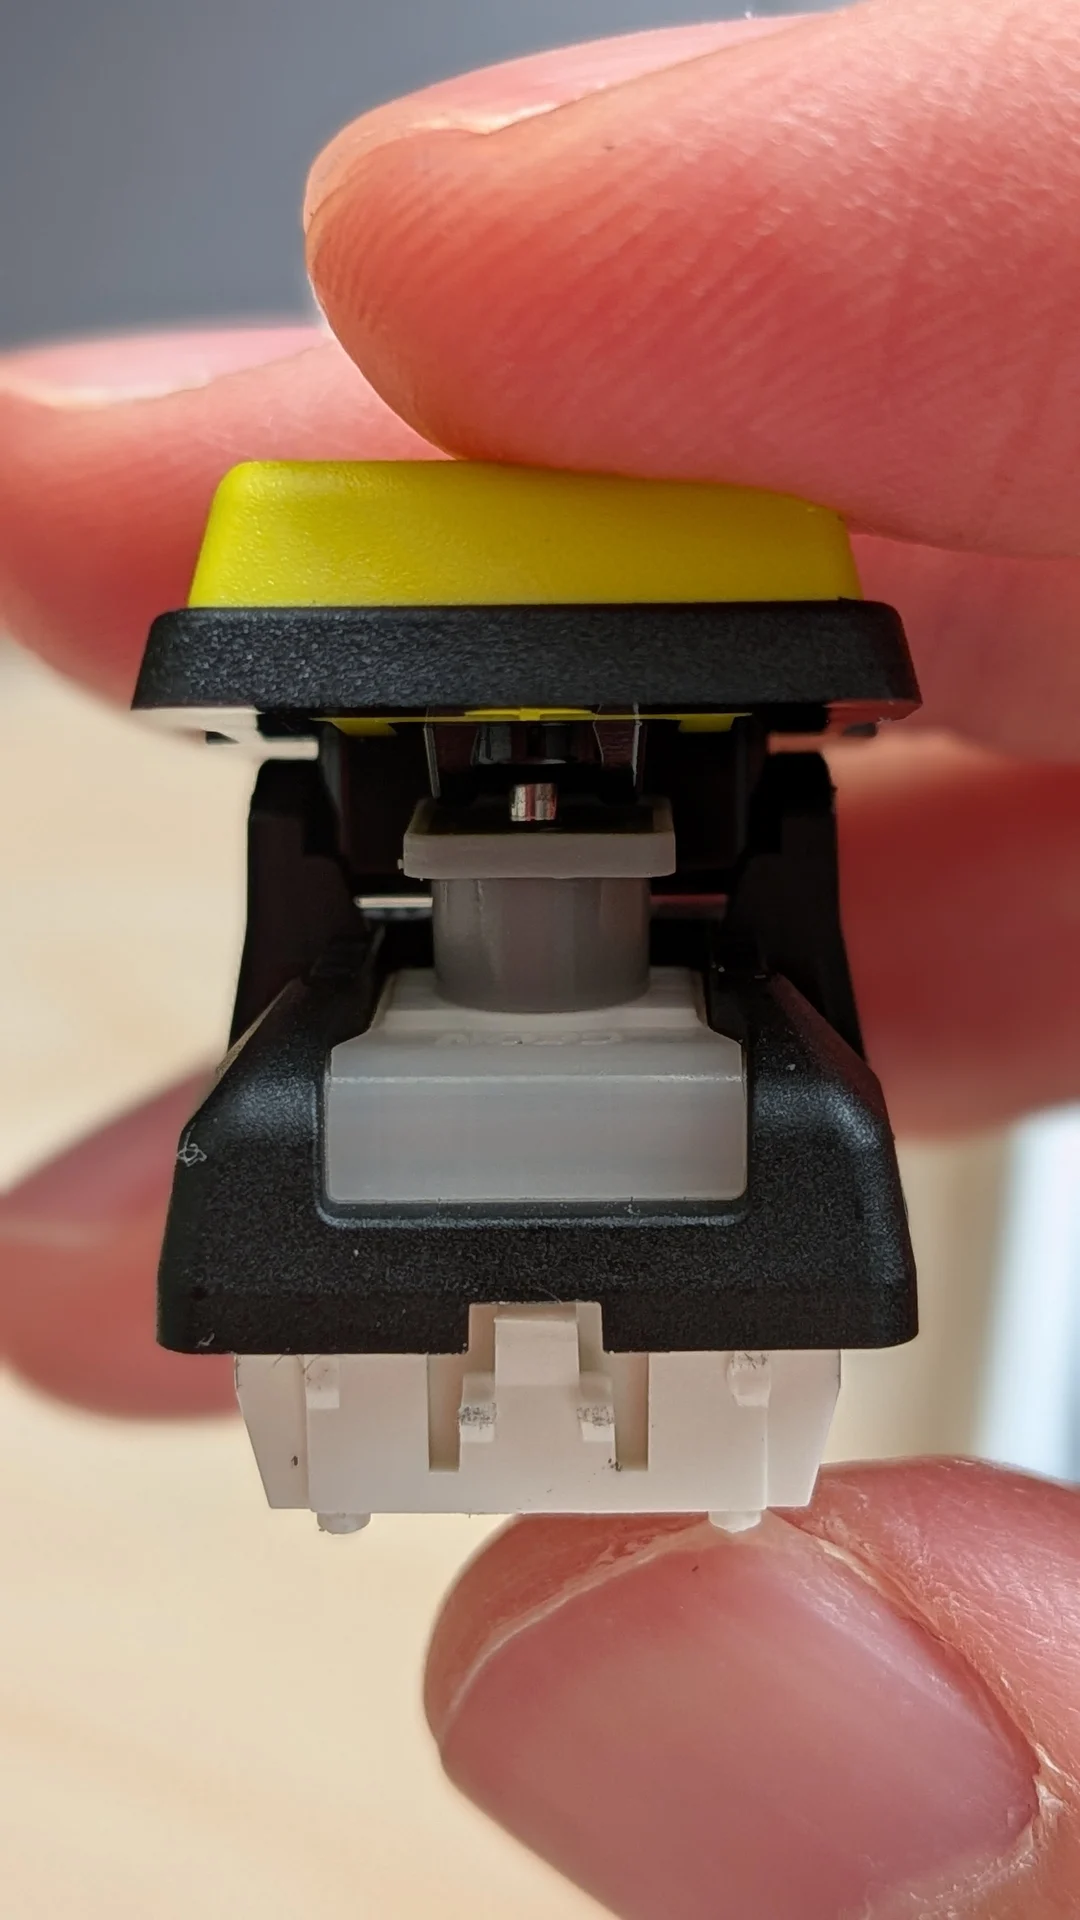
The shape made more sense once I snapped the TriggerKey onto a switch. The raised edge gives your fingertip something to press against, and the top pivots like a small pedal. The base clips onto the switch housing while the lever pushes down on a small adapter fitted to the stem. I could mount it in either direction and choose which way the raised edge faced.
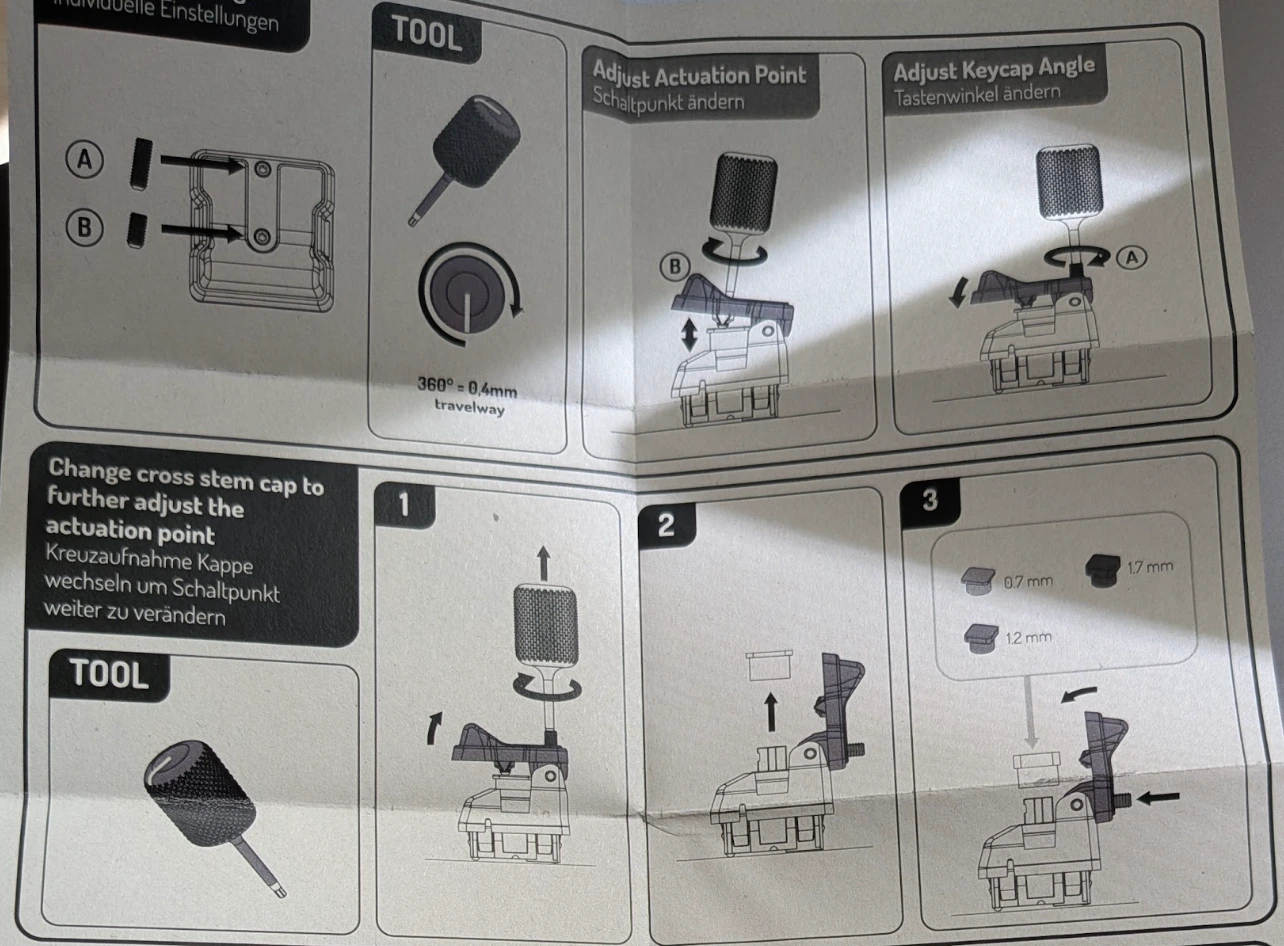
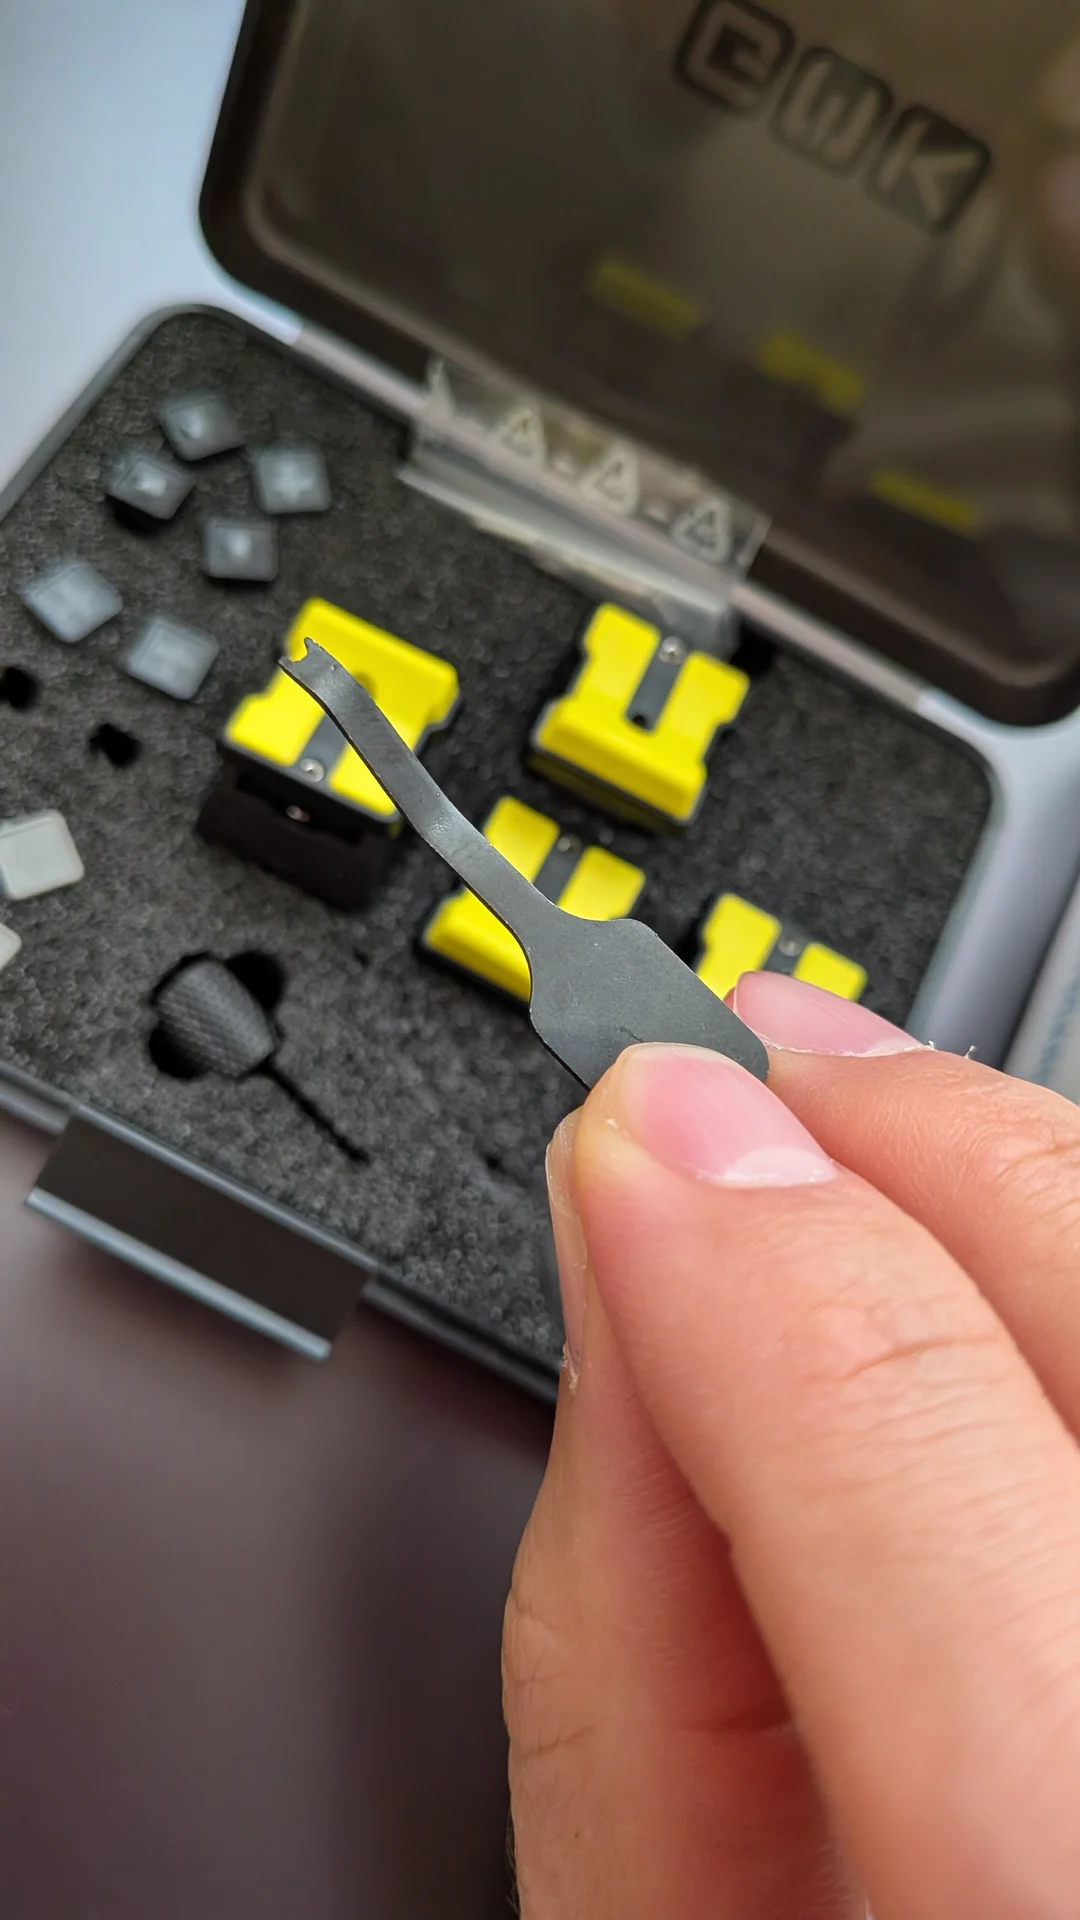
The storage case also holds four stem adapters in each of three heights (0.7, 1.2, and 1.7 mm), an adjustment tool, a removal tool, and spare screws.
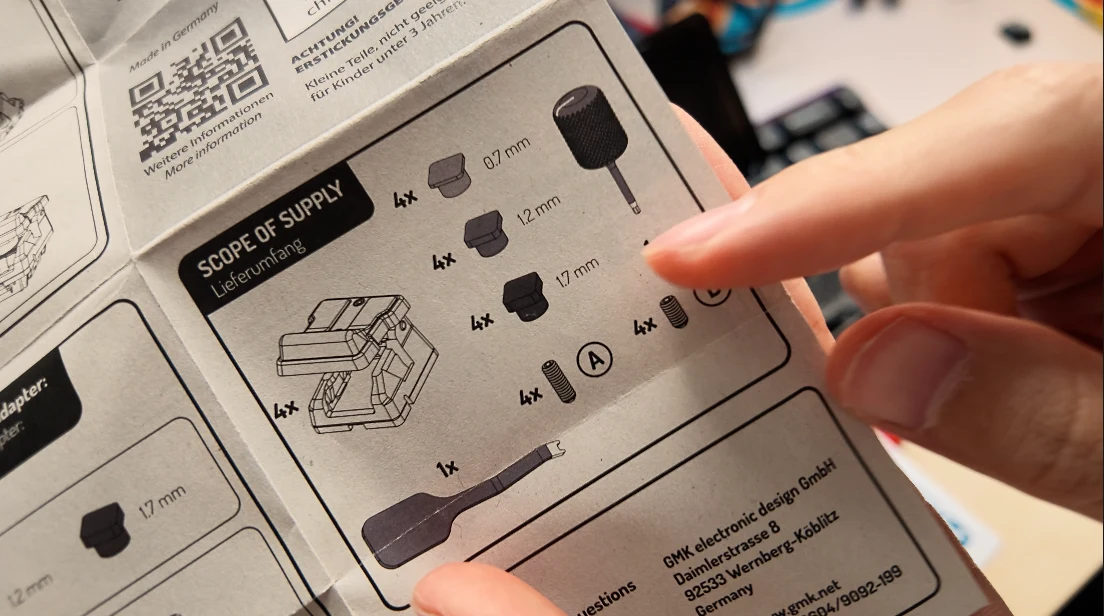
How to install the TriggerKey
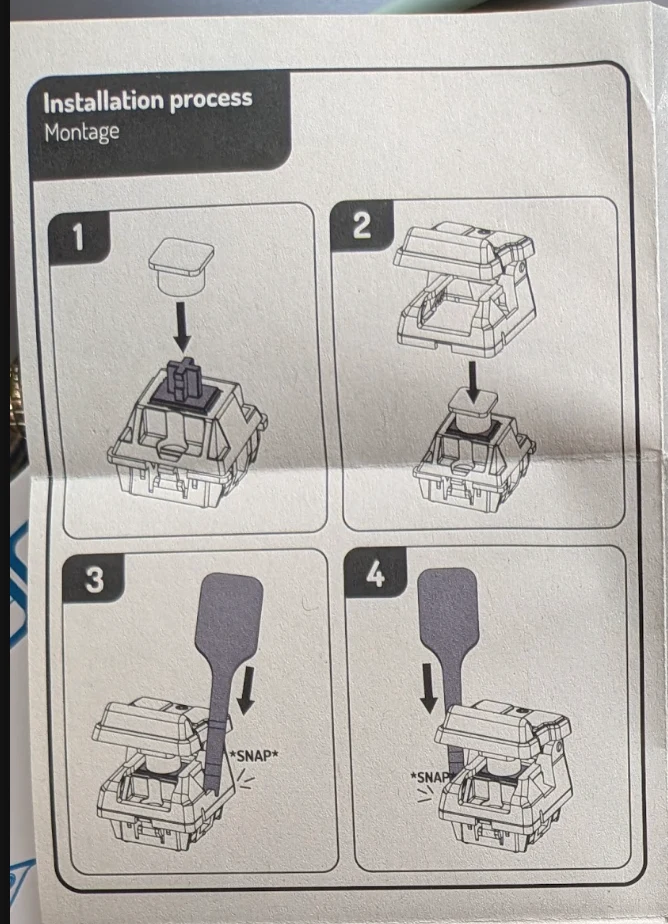
Pull off the original keycap and check that the switch housing has an exposed recess for the TriggerKey’s clips. Press a supplied adapter onto the switch’s cross stem, then lower the TriggerKey assembly over the switch with the raised edge facing the way you want it.
Use the flat installation tool to press down on one side of the base until it snaps into place. Repeat on the other side. Check that the base sits evenly and stays in place while the lever moves and returns freely. The photos below show how the base sits around the housing once both clips are seated.
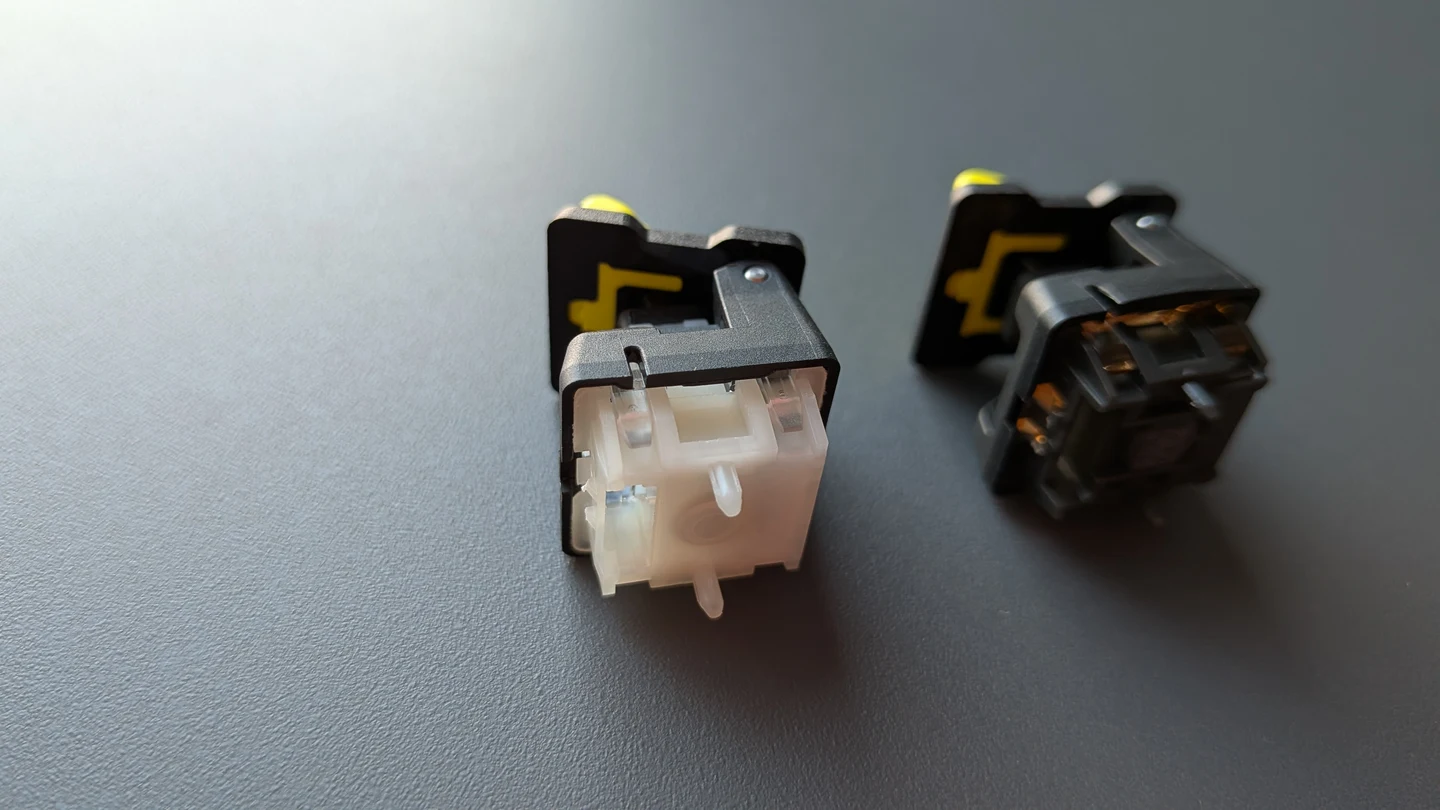
How to adjust actuation with the screw
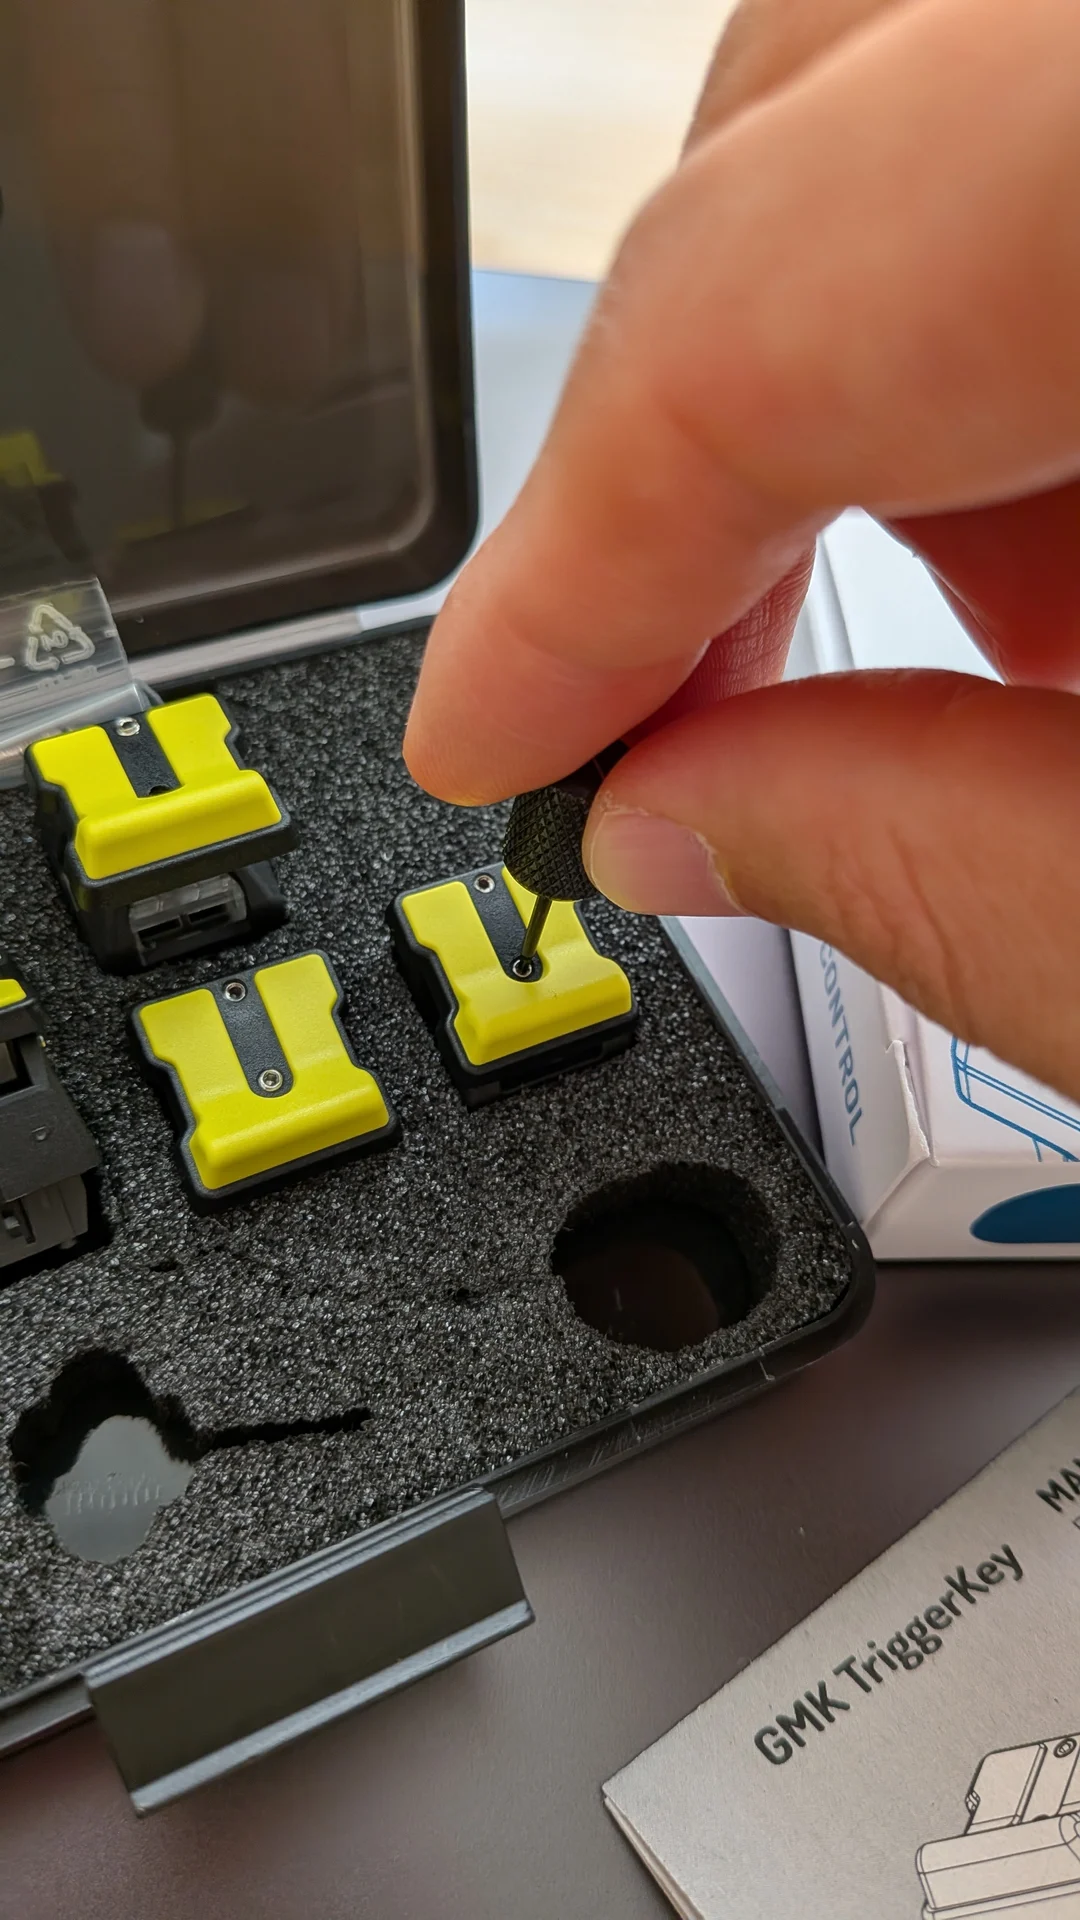
With the TriggerKey installed, use the included driver on screw B, the screw nearest the raised edge of the keycap. Its tip presses on the adapter under the lever. Screw A adjusts the resting angle of the keycap, with up to 34° of tilt according to GMK.
Turn screw B clockwise in small increments to extend it toward the stem adapter. The lever engages the stem sooner and can hold it slightly down at rest, so the input registers with less keycap movement. Turn the screw counterclockwise to back it out for a deeper press. GMK’s manual shows 0.4 mm of screw adjustment per full turn.
Try the key in VIA after each adjustment. Check that it registers at a depth you like and releases cleanly when you lift your finger. If the key registers while your finger is resting on it, back the screw out slightly and try again.
How it felt on a Cherry Nixie
I compared a conventional keycap and the TriggerKey on Cherry MX Nixie switches using VIA’s key tester. Cherry specifies 2.0 mm of pre-travel and 4.0 mm of total travel for the MX Black Clear-Top. With the regular cap, I had to push down noticeably before VIA registered the press. With the 1.7 mm adapter installed and the actuation screw tuned, a light touch on the lever was enough.
VIA showed when a press registered. I didn’t measure the remaining travel or test input latency. For context, Geon lists 0.9 mm of pre-travel for the Geon Raptor MX Extreme, a mechanical speed switch. The TriggerKey takes a different approach by giving you a way to tune the press on a compatible switch you already own.
Check the switch housing before buying
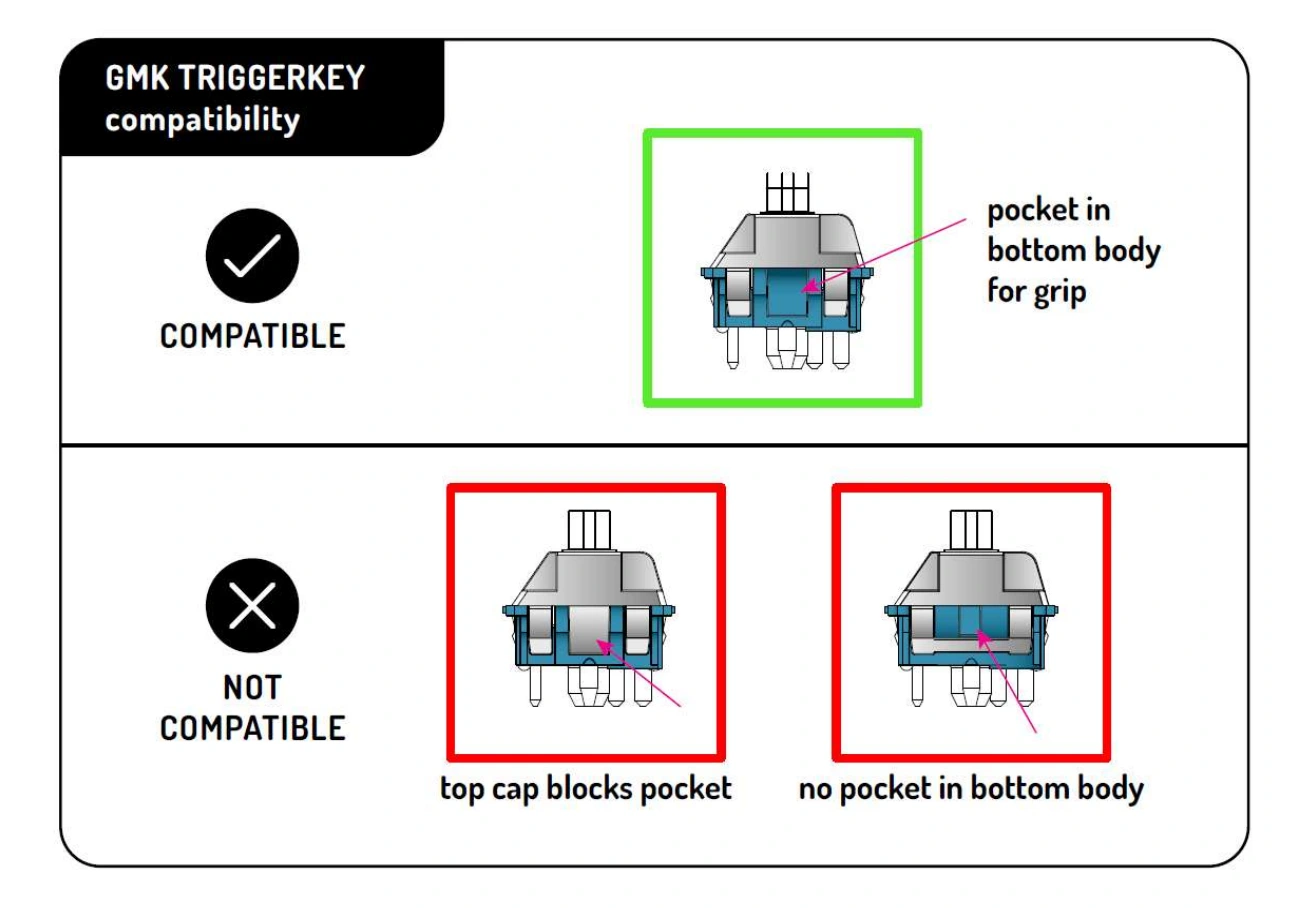
The mount needs an exposed recess in the lower housing for its clip. If the top housing covers that recess, or the lower housing has no recess, the base has nothing to grab. GMK’s compatibility list includes the Geon Raptor MX Extreme and several standard Cherry MX models. It marks Kailh BOX switches and many Hall effect models as incompatible.
If your Hall effect keyboard already lets you set actuation in software, the raised surface and tilt are the main reasons I’d consider a TriggerKey on a confirmed fit. On a mechanical board, the lever can reduce the movement needed to reach the switch’s fixed contact point. The keyboard still uses its existing actuation and reset behavior, so this setup doesn’t add the dynamic reset of Rapid Trigger.
How to remove the TriggerKey
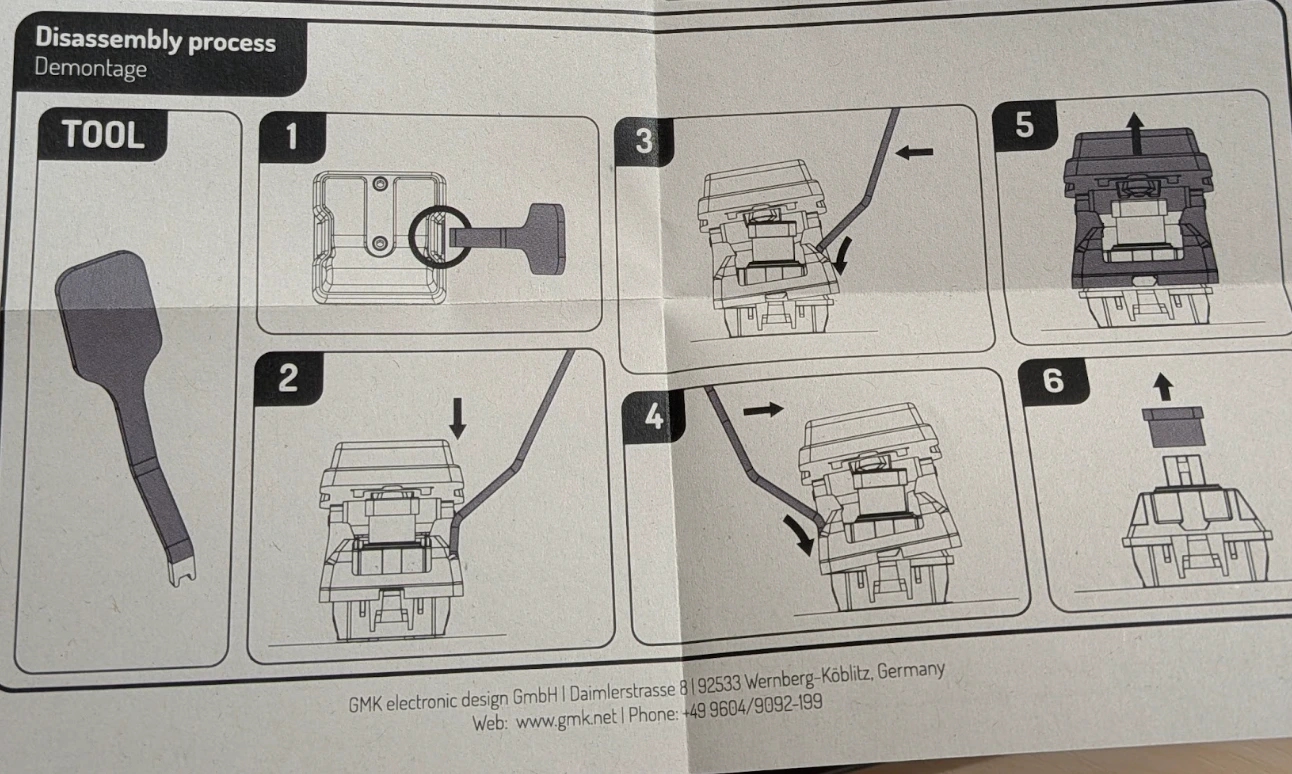
Use the flat removal tool supplied with the kit. Seat its notched tip in the opening on one side of the TriggerKey base. Gently lever the clip free, then repeat on the other side.
Once both clips are free, lift the TriggerKey assembly straight off the switch. Pull the small adapter off the cross stem before putting the original keycap back on.
Verdict
The TriggerKey makes sense if you like your mechanical keyboard and want a shorter, tunable press on a few gaming keys. I liked how easy the raised edge was to press. I’d leave a little room before actuation for keys I tend to rest my fingers on, especially after seeing how easily the demo setup registered a touch.
For everyday typing alone, I’d have a hard time justifying the cost of four adjustable keys.